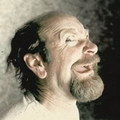
Good stuff Bustak..
I usually have just done 'autolevels', 'autocolour' and cropped my image when in Photoshop, but I'll have a play around with the levels manually next time... Cheers.
Results 26 to 50 of 80
Thread: How I make my images * POP *
-
22-03-2008, 12:21 AM #26
-
22-03-2008, 12:31 AM #27
Good tutorial.
Thanks
Going to go and pop some pics now.
-
22-03-2008, 09:12 AM #28
So what's next Bustak? maybe leaving the flower in colour and everything else (background) back and white??

Last edited by cimboc; 22-03-2008 at 11:18 AM.
-
22-03-2008, 10:09 AM #29Hifaluten Member


- Join Date
- Aug 2005
- Last Online
- 08-02-2019 @ 10:23 PM
- Location
- Fiji Islands
- Posts
- 3,186
Great stuff Bustak. Thanks. Have frigged around with this a bit, and got a bit confused when I came across this pic which has 3 distinct modes in the distribution. Any tips?

-
22-03-2008, 03:38 PM #30
^ not a lot of information in the shadow area, so here's w/ a minor adjustment, anymore the picture would look unnatural:

Honestly I would leave this image alone, not all pictures have to have deep shadows.
-
22-03-2008, 05:25 PM #31Whopping Member


- Join Date
- Nov 2005
- Last Online
- 06-06-2017 @ 03:52 PM
- Location
- In the comfy chair
- Posts
- 5,549
Thank you Busty for your excellent tips. Here's my first effort, of a bambi from the Tweechol Botanical Gardens:
Before Bustification:

After Bustification:

-
22-03-2008, 11:27 PM #32Thailand Expat


- Join Date
- May 2006
- Last Online
- 10-07-2018 @ 02:43 AM
- Location
- Hope Valley nr. Sheffield
- Posts
- 1,112
That's a great start from Bustak. I thought I would expand on it a little.
Levels divides your pixels across 256 levels of brightness (0-255) with 0 being absolute black and 255 being pure white. The height of the chart shows the number of pixels at that level of brightness. Generally, move the left and right pointers in to where your chart starts to show pixels exist to expand the contrast levels. What was a flat picture with light grays and dark grays now has full white and black. Move the midtone slider to the left and you are generally lightening your image, to the right and you are darkening it.
This is because the pointer represents 50% grey, moving it to the right means that pixels that were, say, 70% grey are now 50%, putting more detail in the shadows. The converse of this of course is that you are reducing details in the highlights.
Lets look at curves then, which can do the same as levels, but has more control. you have the same black to white scale along the base, but now you have a black to white scale up the side as well. this second scale is the output scale. To see the relationship between levels and curves, imagine the diagonal line in curves as looking down on top of the histogram in levels. Curves doesn't give you such an easy visualisation, but it gives much more control. You can click on the line to define up to 15 anchor points then drag them to adjust the contrast in just a small range. A good starting point is to produce a shallow 's' curve as follows:

Next, sharpening the picture. Only do this when you have finished all cropping and resizing. Sharpen works, but only the same as auto levels or auto contrast can be said to work. If you have CS2 or above, use Smart Sharpen.. otherwise use Unsharp Mask. Do a Google to find detailed information on them.
Finally, this type of adjustment is probably better handled in Lightroom these days and is certainly easier to apply to batches of images.Last edited by BigRed; 23-03-2008 at 01:26 AM.
-
23-03-2008, 09:42 PM #33Hifaluten Member


- Join Date
- Aug 2005
- Last Online
- 08-02-2019 @ 10:23 PM
- Location
- Fiji Islands
- Posts
- 3,186
Had some fun popping this pic of Wayne Jnr showing off his snacks this afternoon (will add he opted for these rather than his chocolate easter eggs).
Any tips on how to get red of that nasty shadow behind him?
 Old travel threads: Outback, Australia | Taytay, Philippines | Busuanga, Philippines | Isaan, Thailand | Phu Quoc Island, Vietnam
-
23-03-2008, 09:52 PM #34Thailand Expat


- Join Date
- May 2007
- Last Online
- @
- Location
- Ratsima
- Posts
- 3,717
The human eye and brain constantly adjust so that every scene you "see" contains at least some areas that are 100% black and others that are 100% white. What you do with the "levels" control is try to give your photographs this same range. Photographers like Ansel Adams and Brett Weston, who worked in film, did this with camera, enlarger and developer. Your job, with tools like Photoshop and GIMP, is much easier. Photos with properly adjusted levels look "snappier" because they look more like the images that your eye/brain produce, with a range that goes from completely black to completely white.
-
23-03-2008, 09:55 PM #35Thailand Expat


- Join Date
- May 2007
- Last Online
- @
- Location
- Ratsima
- Posts
- 3,717
A good example is Benbaa's Bambi photo. The "before" image contains no area that is 100% black and none that is 100% white. After adjustment the rocks contain areas of 100% white and the eyes and some shadows contain some 100% black. Even though the adjustment reduced some detail (the rocks) the photo looks more real because it looks more like the image your eyes and brain produce all the time.
-
23-03-2008, 10:01 PM #36
-
24-03-2008, 08:04 AM #37Thailand Expat


- Join Date
- Jan 2006
- Last Online
- @
- Posts
- 59,983
that could take forever... Originally Posted by ChiangMai noon
-
24-03-2008, 09:39 AM #38
^^ nice job.
One way you can remove the shadow is w/ the clone tool:
Anyway, I like the shadow.
I don't like using the clone tool that much, in recent days I just use it for removing scratches &/or dust from film. Even in those cases I usually leave it in."I'm never gonna work another day in my life
The gods told me to relax
They said I'm gonna be fixed up right"
Monster Magnet
-
24-03-2008, 09:43 AM #39Thailand Expat


- Join Date
- Jun 2005
- Last Online
- 08-09-2014 @ 10:43 AM
- Location
- Simian Islands
- Posts
- 34,827
That's the one. Originally Posted by bustak
-
27-03-2008, 07:51 AM #40Thailand Expat


- Join Date
- Jan 2006
- Last Online
- @
- Posts
- 59,983
Before Bustification:
After Bustification:

Before:
After:

-
27-03-2008, 11:20 AM #41Thailand Expat


- Join Date
- Jun 2005
- Last Online
- 08-09-2014 @ 10:43 AM
- Location
- Simian Islands
- Posts
- 34,827
It helps if you can focus your camera...
-
27-03-2008, 11:43 AM #42Thailand Expat


- Join Date
- Jan 2006
- Last Online
- @
- Posts
- 59,983
it was quite dark. Originally Posted by Marmite the Dog
-
28-03-2008, 09:24 AM #43Whopping Member


- Join Date
- Nov 2005
- Last Online
- 06-06-2017 @ 03:52 PM
- Location
- In the comfy chair
- Posts
- 5,549
*snigger* Originally Posted by Marmite the Dog
I thought it, but didn't say it...
-
28-03-2008, 10:42 AM #44Thailand Expat


- Join Date
- Jan 2006
- Last Online
- @
- Posts
- 59,983
expect reds u lot!
-
28-03-2008, 07:13 PM #45
-
29-03-2008, 12:46 AM #46
^ yeah, nice job guys!
-
29-03-2008, 09:13 AM #47Thailand Expat


- Join Date
- Jan 2006
- Last Online
- @
- Posts
- 59,983
-
29-03-2008, 02:28 PM #48Thailand Expat


- Join Date
- Jun 2005
- Last Online
- 08-09-2014 @ 10:43 AM
- Location
- Simian Islands
- Posts
- 34,827
^ Good effort - that's nearly in focus.
-
29-03-2008, 03:05 PM #49Thailand Expat


- Join Date
- Jan 2006
- Last Online
- @
- Posts
- 59,983
condescending turd, it is ion focus, put your glasses back on! Originally Posted by Marmite the Dog
-
30-03-2008, 04:36 PM #50
Now way it is, I thought I was pissed looking at that
Thread Information
Users Browsing this Thread
There are currently 1 users browsing this thread. (0 members and 1 guests)


 Reply With Quote


